How to create an HTML contact form with file upload to Amazon S3 | Step-by-step guide

In this tutorial, we are going to create a sample app using Express.js to upload files to Amazon S3, then we are going to save our submission to the MongoDB
Prerequisites for the tutorial
I don't want to cover some things that would over-complicate this tutorial, therefore I assume you know how to:
- Get your API keys from Amazon AWS
- Create a bucket on Amazon S3
If you don't know how to do that, you can take a look at this blog post, it's fairly simple to follow.
Steps we are going to follow
- Create a Contact Form using HTML
- Bootstrap an Express.js app
- Parsing form data
- Uploading the file to S3
- Saving the data to MongoDB
Let's create a simple contact form using HTML
The key things when creating an upload form are the attributes you defined in <form>.
Let's create a simple form:
<form action="#" method="POST">
    <label for="email">Email Address</label>
    <input type="email" id="email" name="email">

    <label for="fullName">Full Name</label>
    <input type="text" id="fullName" name="fullName">

    <label for="message">Message</label>
    <textarea name="message" id="message"></textarea>

    <label for="photo">Photo</label>
    <input type="file" id="photo" name="photo">

    <button type="submit">Submit</button>
</form>
We have built free form generator tool that you can customize and get HTML code, make sure you check it out if you need form template.
In the software world, most of the configurable options have a default value that will apply unless you override it, and one of these for form is enctype.
When you make an request to the backend, you have to encode the form data, there are 3 options available for enctype:
application/x-www-form-urlencoded(default)multipart/form-datatext/plain
Through the w3 specification;
The content type "application/x-www-form-urlencoded" is inefficient for sending large quantities of binary data or text containing non-ASCII characters.
The content type "multipart/form-data" should be used for submitting forms that contain files, non-ASCII data, and binary data.
Also unless you really know what you are doing, do not ever use text/plain (click here for why.)
So what we want to do is set enctype to multipart/form-data
- <form action="#" method="POST">
+ <form action="#" method="POST" enctype="multipart/form-data">
	<label for="email">Email Address</label>
    <input type="email" id="email" name="email">

    <label for="fullName">Full Name</label>
    <input type="text" id="fullName" name="fullName">

    <label for="message">Message</label>
    <textarea name="message" id="message"></textarea>

    <label for="photo">Photo</label>
    <input type="file" id="photo" name="photo">

    <button type="submit">Submit</button>
</form>
Now we have a simple contact form that's ready to send data to our express app that we're going to develop now. Let's save this to somewhere for now.
Bootstrap an Express.js app
I assume that you've already installed Node.js.
Let's create and directory for our application using terminal/bash
$ mkdir my-form my-form/views
$ cd my-formUse the npm init command to initialize our project.
$ npm initJust hit enter for everything, and install express.js using:
$ npm install express express-fileupload --save
$ npm install nodemon -gNow we have a directory structure like this:
.
|____my-form
| |____package.json
| |____views
Save the form that we created in the beginning under the views folder as form.html
.
|____my-form
| |____index.js
| |____package.json
| |____views
| | |____form.htmlLet's create our index.js:
const express = require('express')
const app = express()
const fileUpload = require('express-fileupload')

app.use(fileUpload({
  // 50mb file limit
  limits: { fileSize: 50 * 1024 * 1024 },
  abortOnLimit: true
}));

app.get('/', (req, res) => {
  res.sendFile('views/form.html' , { root : __dirname});
})

// endpoint that will handle the form
app.post('/submit', (req, res) => {
  const {body, files} = req
  res.send({body, files})
})

const port = 3031

app.listen(port, () => {
  console.log(`Application is available at http://localhost:${port}`)
})Save it, then open the form.html and point the form to the /submit endpoint we just created with express app:
- <form action="#" method="POST" enctype="multipart/form-data">
+ <form action="/submit" method="POST" enctype="multipart/form-data">Don't have much time for a form?
File upload is not something you can achieve instantly, so if you want to have a quick and simple solution, check out our other blog post.
 Nusu Alabuga
Now let's add some style:
<!DOCTYPE html>
<html lang="en">
<head>
  <meta charset="UTF-8">
  <meta name="viewport" content="width=device-width, initial-scale=1.0">
  <title>Contact Form</title>
  <link href="https://fonts.googleapis.com/css2?family=Inter&display=swap" rel="stylesheet">
  <style>
    body {
      font-family: "Inter";
    }

    label, button {
      font-size: 16px;
      cursor: pointer;
    }

    input, textarea {
      border: 3px solid #eee;
      padding: .4em 1em;
      border-radius: 6px;
    }

    form {
      display: grid;
      grid-row-gap: 10px;
      justify-content: center;
    }

    button {
      margin-top: 10px;
      background: #133EF5;
      color: #fff;
      padding: 10px 0;
      border: 0;
      border-radius: 6px;
    }
  </style>
</head>
<body>
  <form action="/submit" method="POST" enctype="multipart/form-data">
    <label for="email">Email Address</label>
    <input type="email" id="email" name="email">

    <label for="fullName">Full Name</label>
    <input type="text" id="fullName" name="fullName">

    <label for="message">Message</label>
    <textarea name="message" id="message"></textarea>

    <label for="photo">Photo</label>
    <input type="file" id="photo" name="photo">

    <button type="submit">Submit</button>
  </form>
</body>
</html>Finally run:
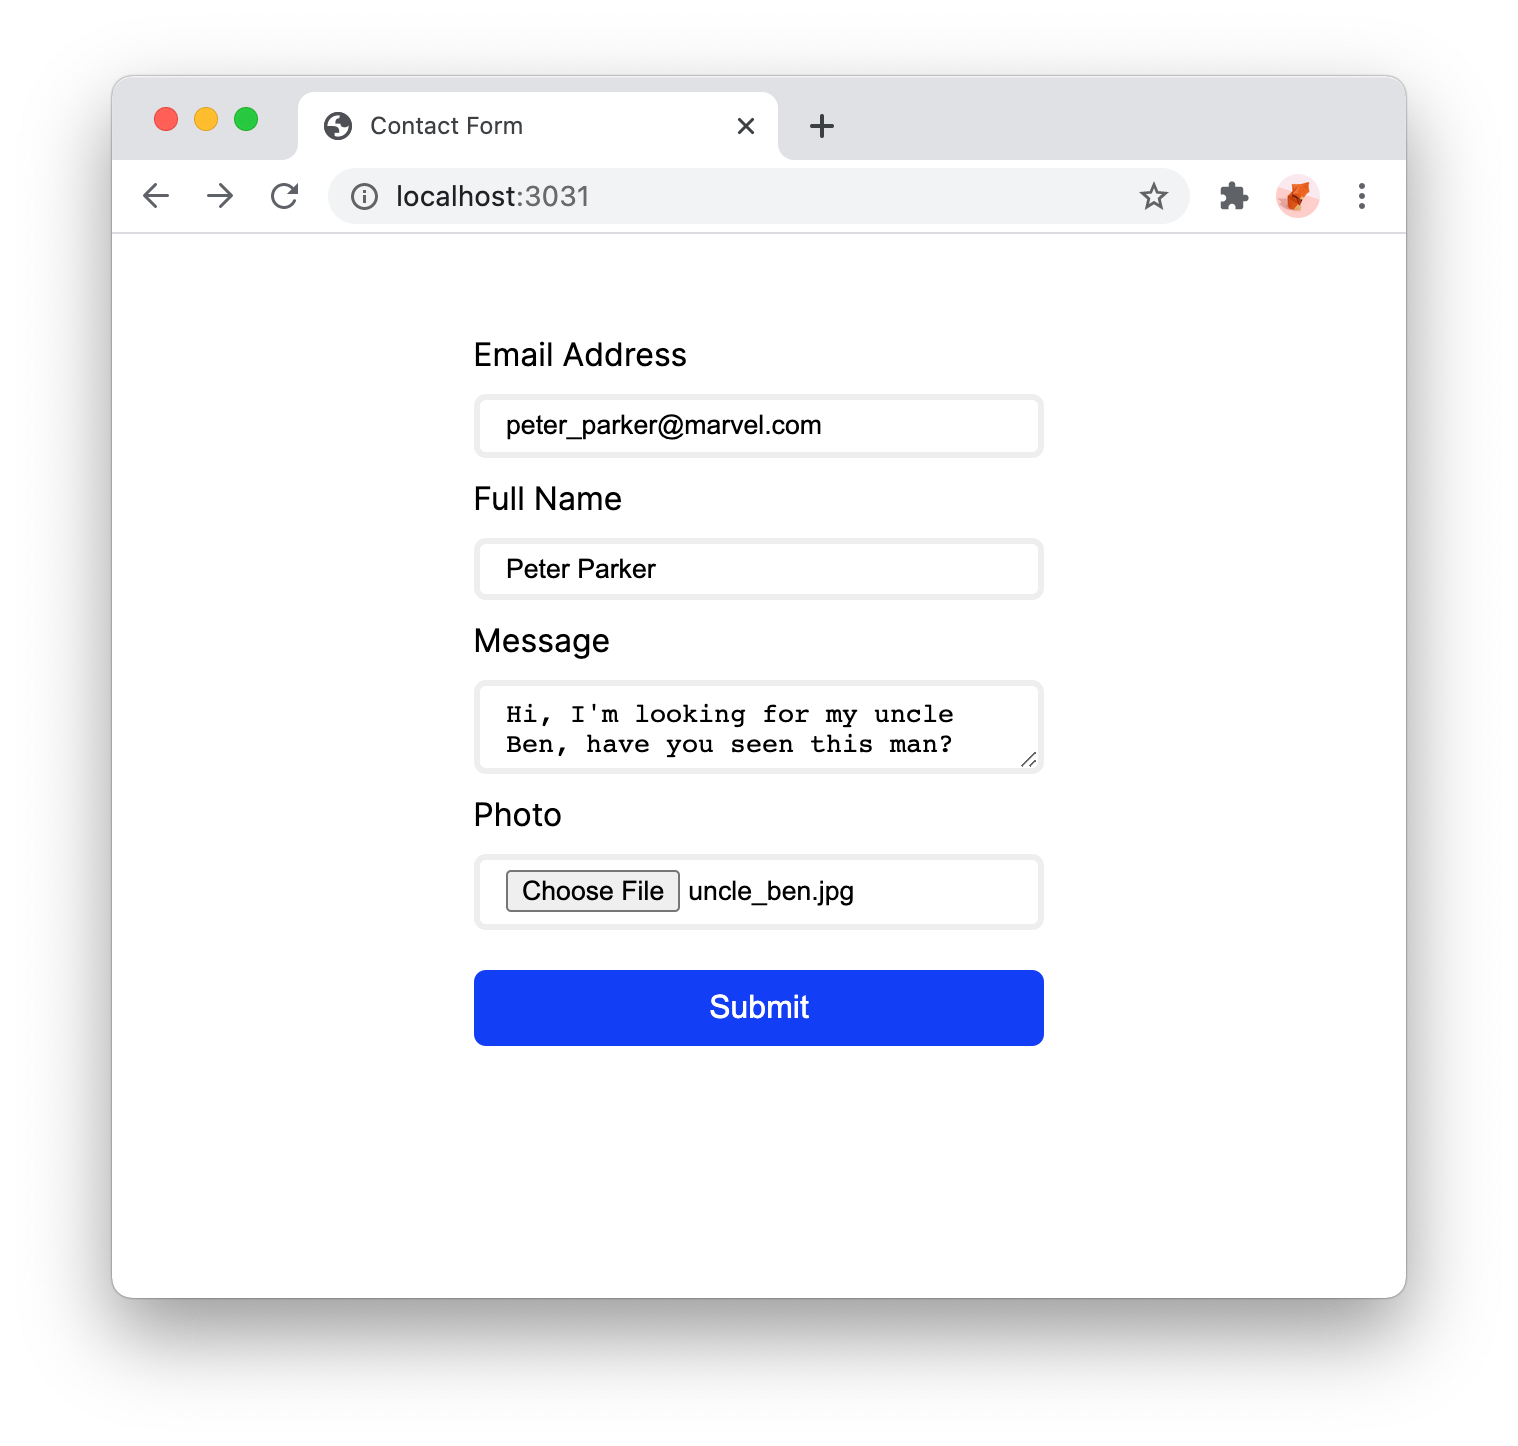
$ nodemon index.jsThen visit http://localhost:3031 from your browser:
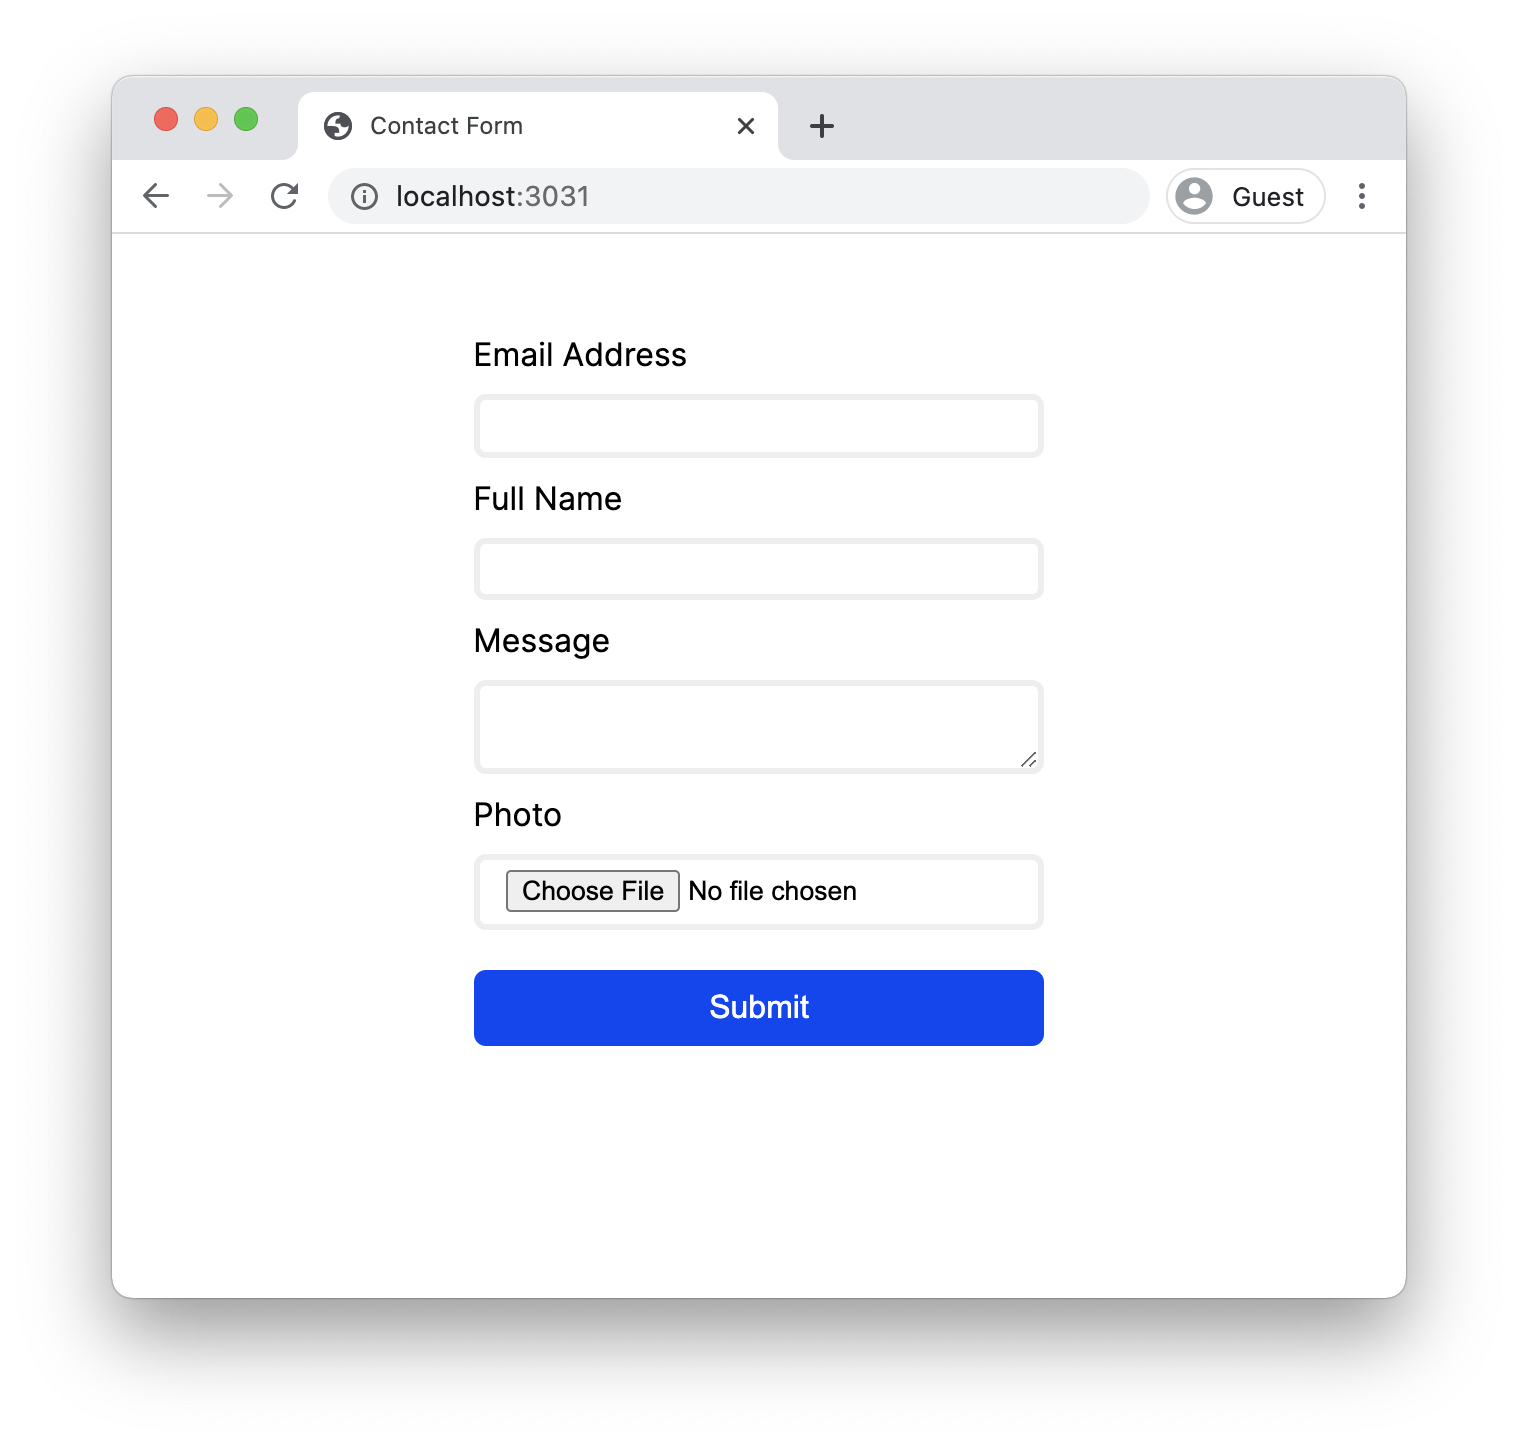
Fill out the form with sample data and file then submit.
You will see something like this:
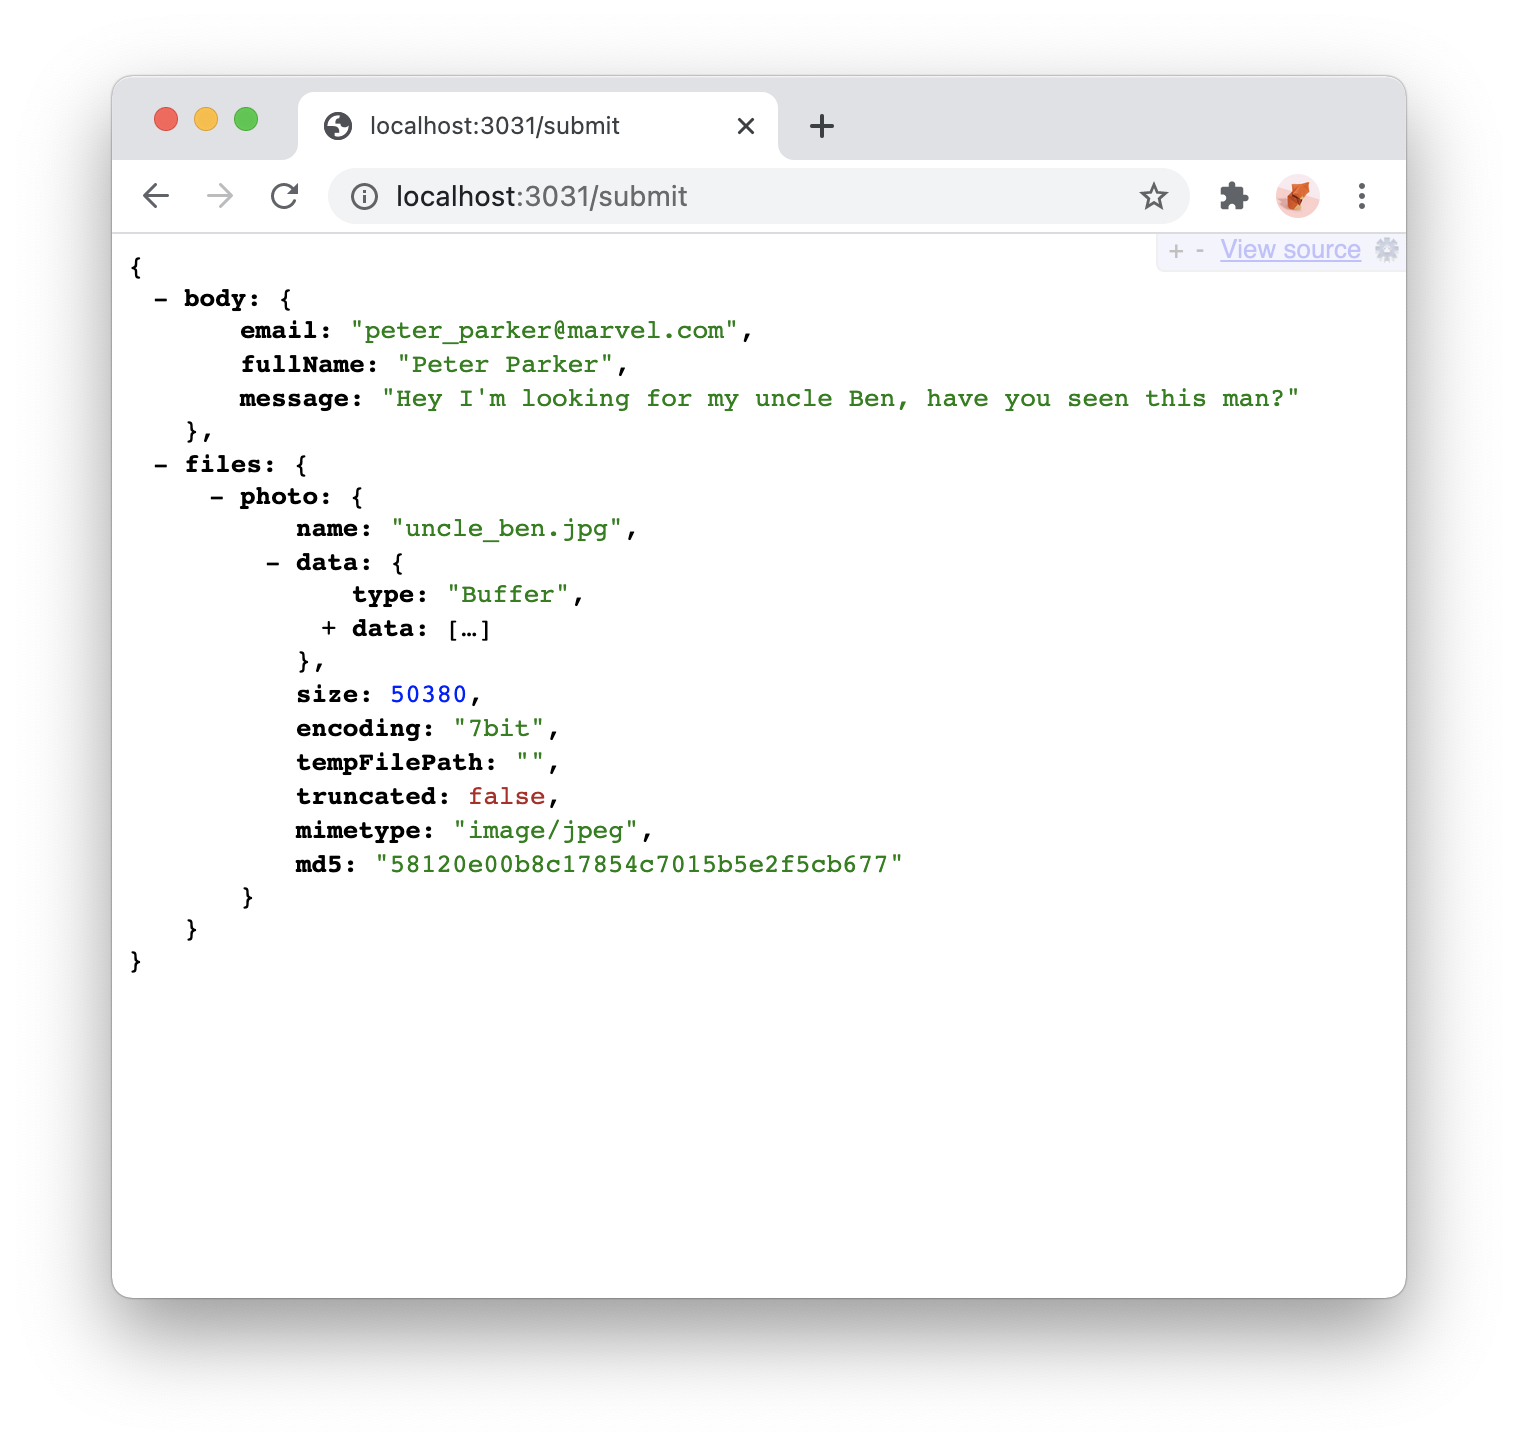
use JSONView Chrome Extension to display JSON content like 👆
Great, now we are ready to do the rest, let's clarify something before getting going:
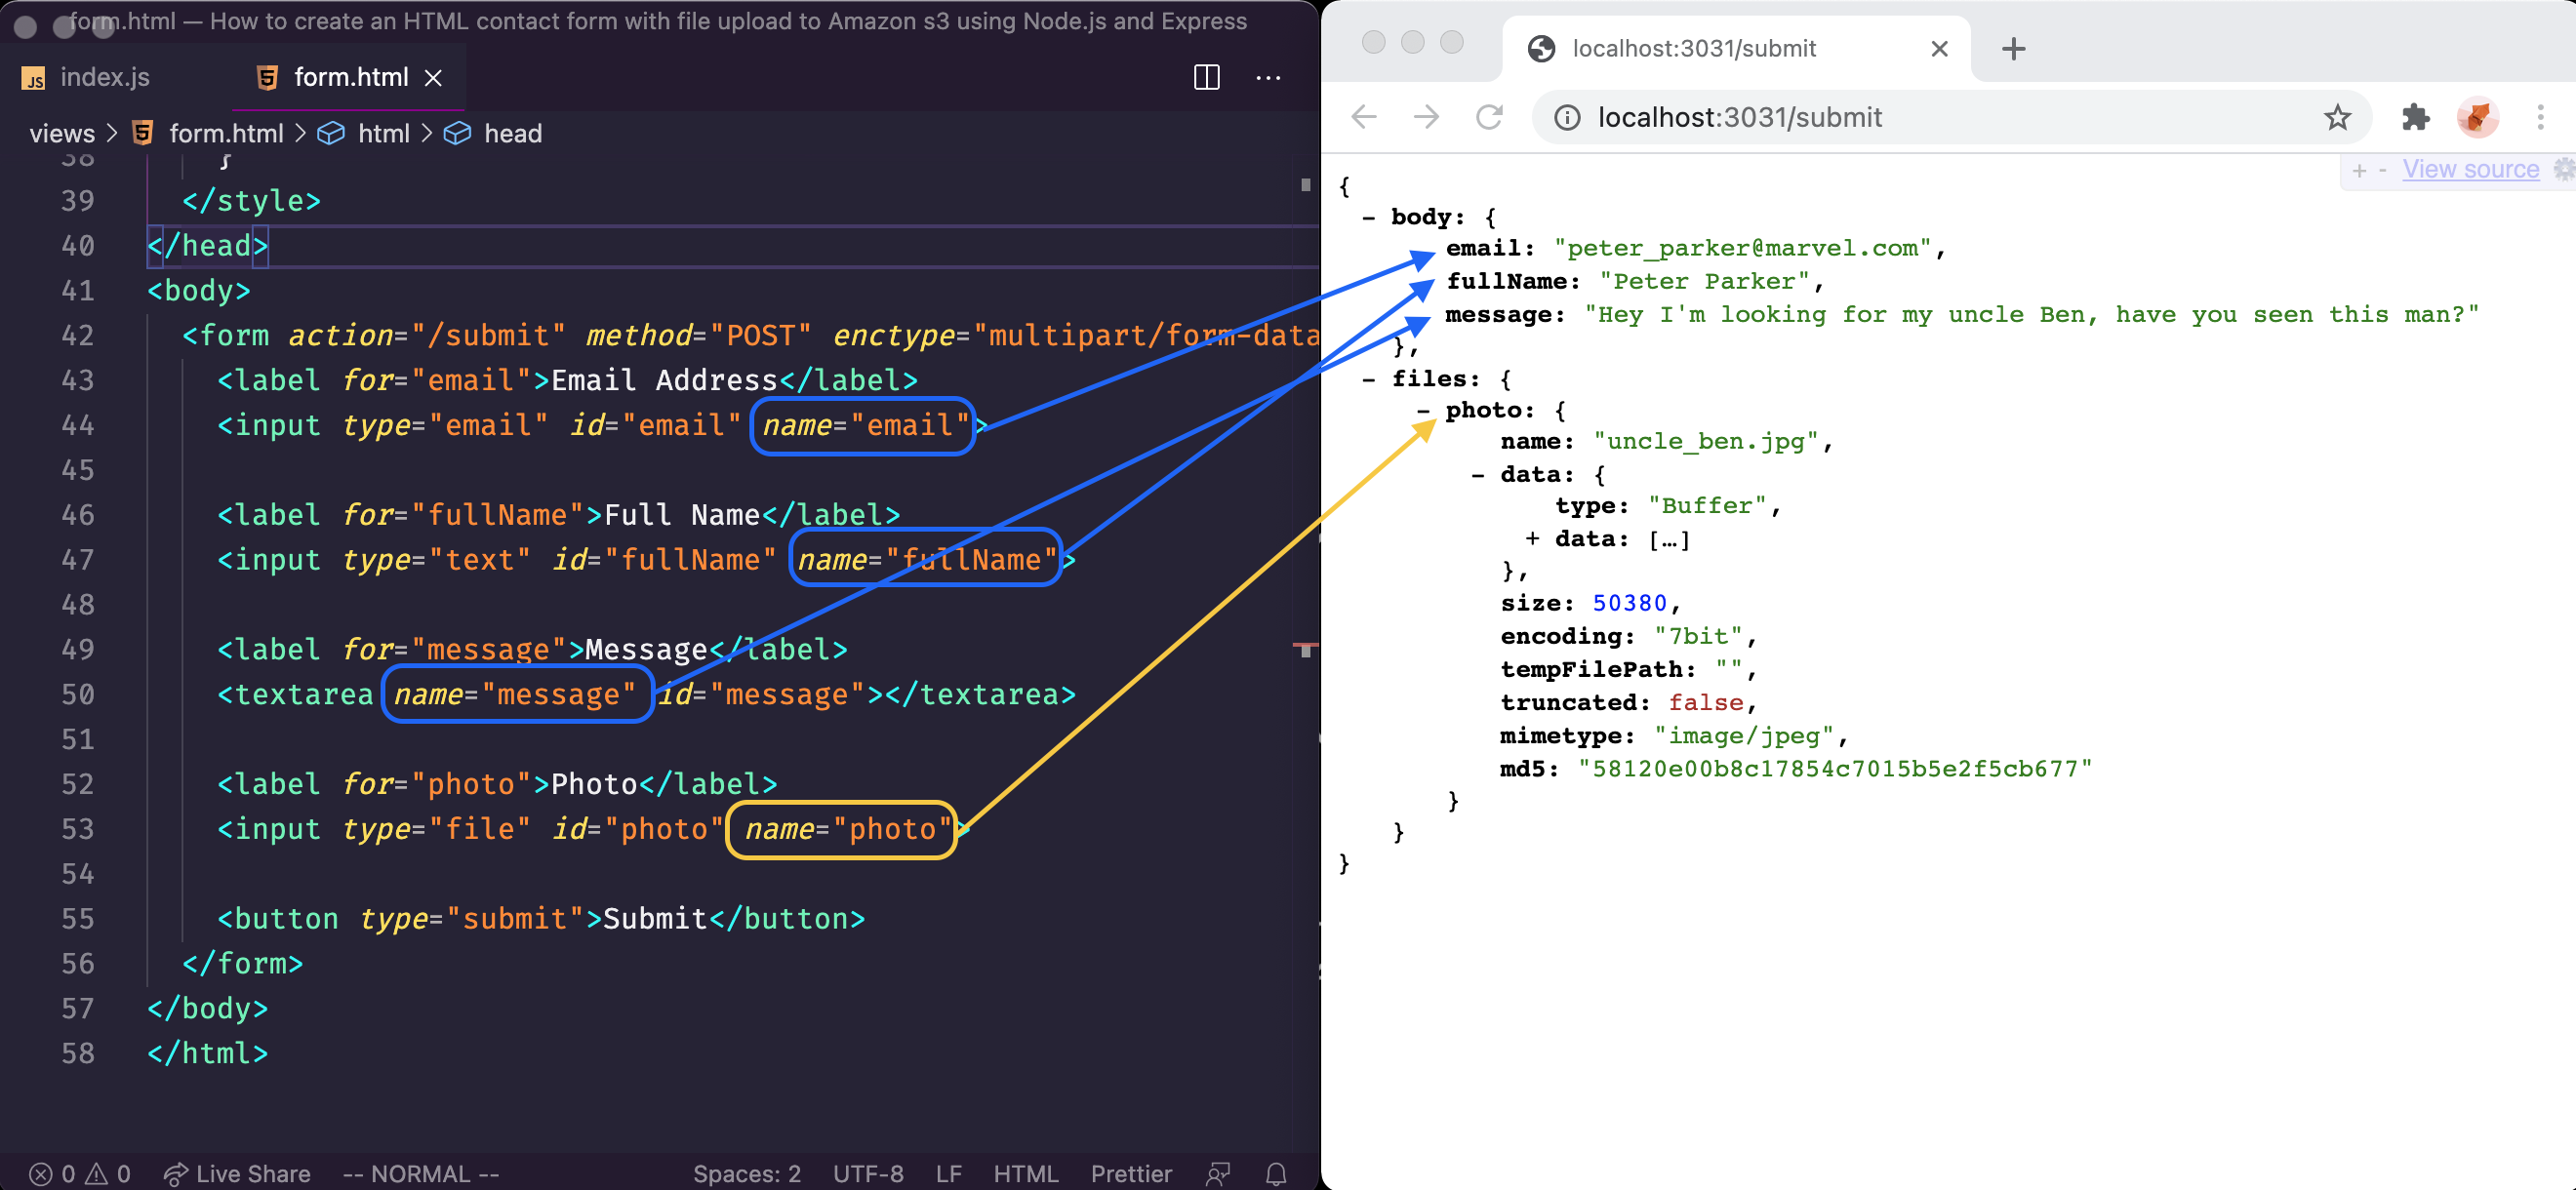
As you can see with the picture above, whatever you define for name will be present on the backend with same value, so if you don't name your fields then you can't parse them.
This is an common mistake so be careful 🕵️
Configuring AWS-SDK
Let's install aws-sdk:
$ npm install aws-sdk --saveThen import it and use the keys that you have obtained from AWS:
const express = require('express')
const app = express()
const fileUpload = require('express-fileupload')
+ const AWS = require('aws-sdk')

+ AWS.config.update({
+  accessKeyId: '<Replace with your access key>',
+  secretAccessKey: '<Replace with your secret key>'
+ })

+ const s3 = new AWS.S3({ params: { Bucket: '<Replace with your bucket name>' }});

app.use(fileUpload({
  // 50mb file limit
  limits: { fileSize: 50 * 1024 * 1024 },
  abortOnLimit: true
}));

app.get('/', (req, res) => {
  res.sendFile('views/form.html' , { root : __dirname});
})

app.post('/submit', (req, res) => {
  const { body, files } = req
  res.send({body, files})
})

const port = 3031

app.listen(port, () => {
  console.log(`Application is available at http://localhost:${port}`)
})Uploading File
We are ready to upload now, first let's transform our function to an async function:
- app.post('/submit', (req, res) => {
+ app.post('/submit', async (req, res) => {Then let's add the code that manages upload:
app.post('/submit', async (req, res) => {
  const { files } = req

  try {
    const upload = new AWS.S3.ManagedUpload({
      params: {
        // pass directly the buffer string
        Body: files.photo.data,
        // pass the file name
        Key: files.photo.name,
        // make it public
        ACL: 'public-read'
      },
      // use the const s3 that we defined above
      service: s3,
    })

    const response = await upload.promise()

    res.send(response)
  } catch (error) {
    res.send(error)
  }
})So what's happening there?
We destructured the req object that holds the files, so const files is equivalent of req.files.
Let's remember our test payload.

Everything under files key is provided by express-fileupload module, which handles the files and returns them in a nice and usable structure.
AWS.S3.ManagedUpload and AWS.S3.Upload can accept Buffer, Typed Array, Blob, String, ReadableStream. While our files.photo.data is a Buffer we can directly pass that to the Body parameter .
ACL is shorthand for Access Control List, which we've set to public-read to view the uploaded file.
Key is the name of our file.
Let's try it
Visit http://localhost:3031/ and fill out the fields. You don't necessarily have to fill anything other than the file because we haven't done anything with it yet.
After you click the Submit button, you will see something like this:
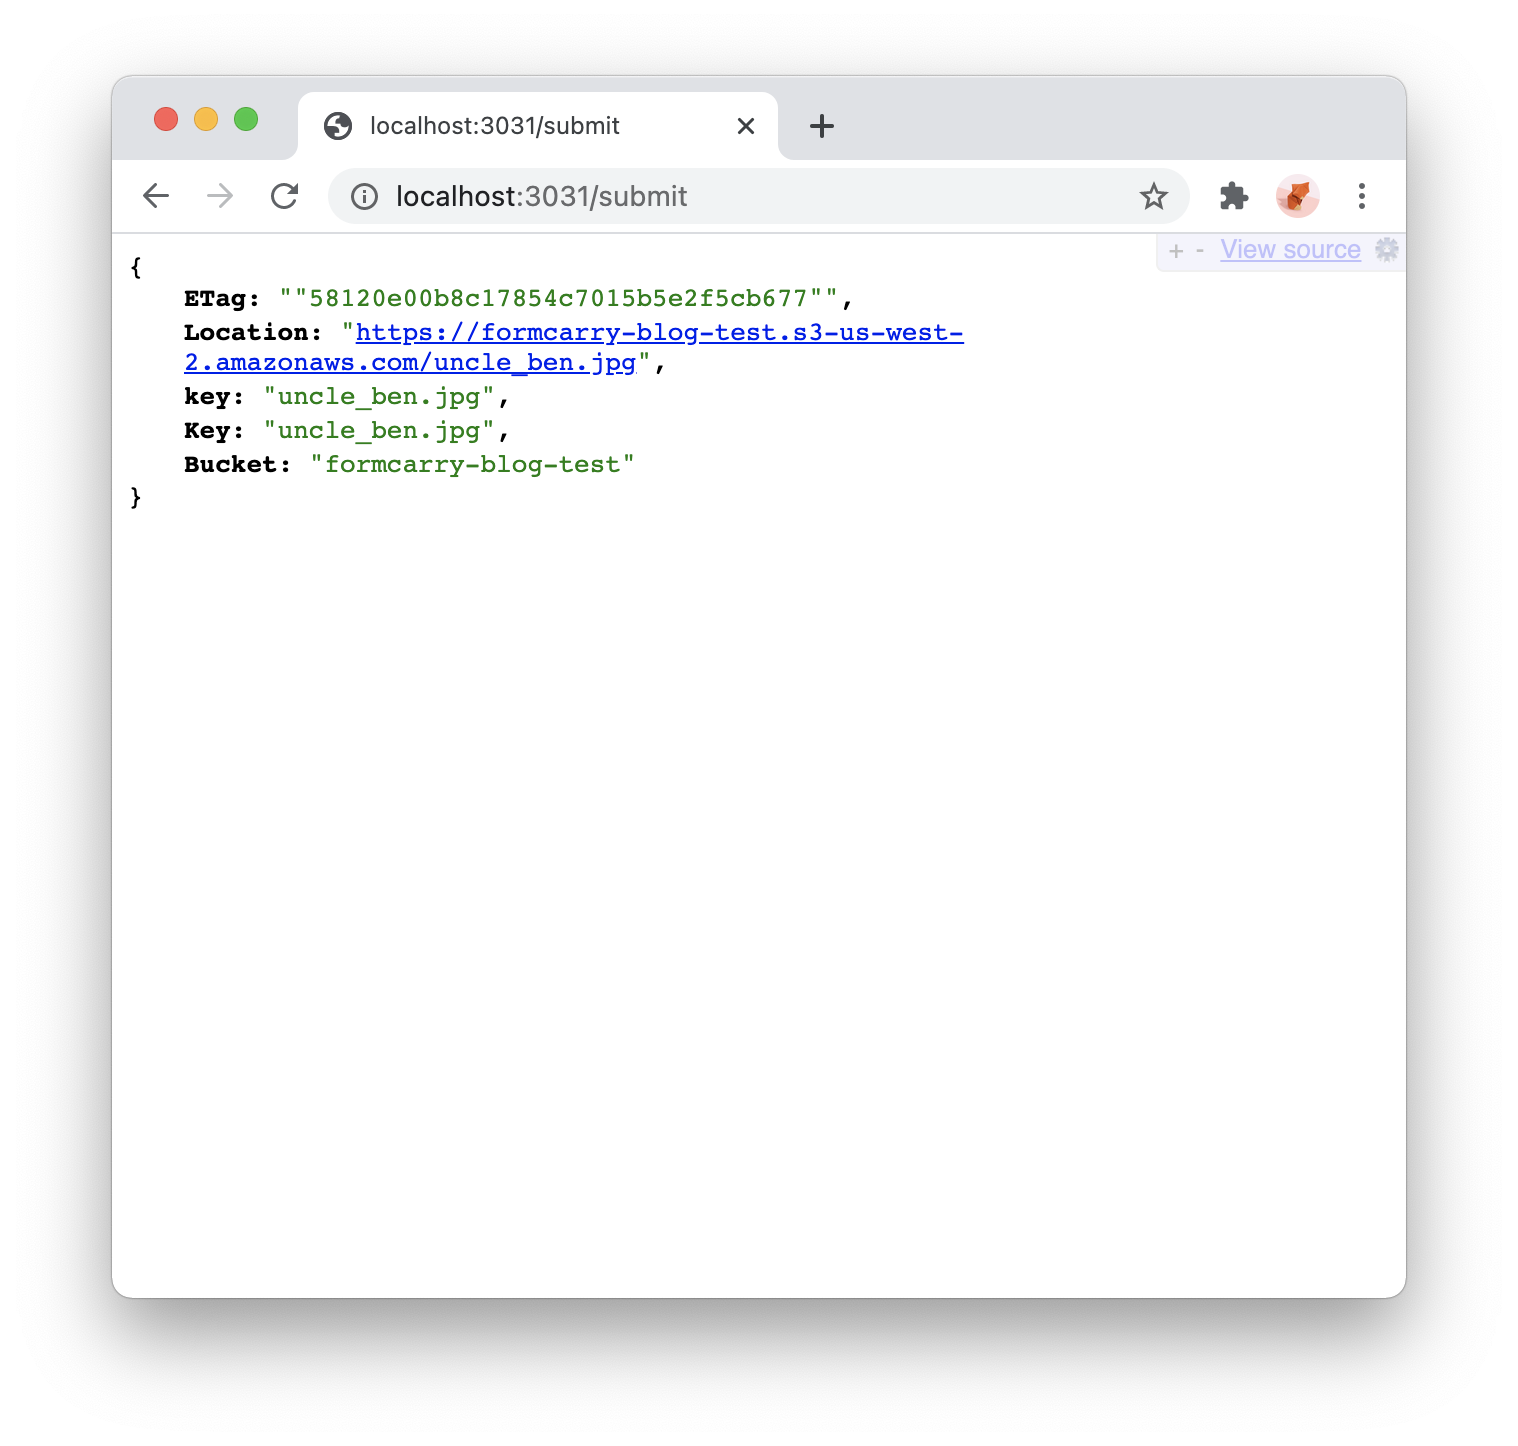
Then check your bucket and you will see the file in the bucket.
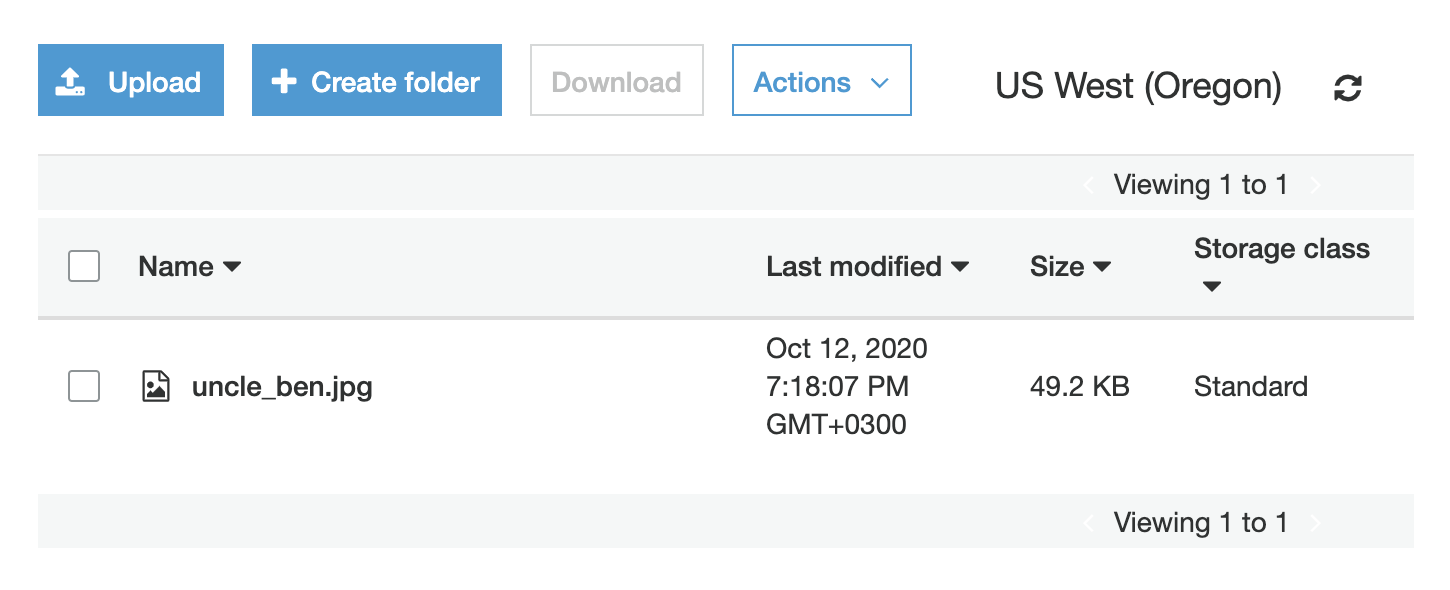
It worked! Now we have form data and the uploaded file details, we can use this data to save to the database or send some webhook.
Renaming the files
It's not a wise choice to use the original file name, in case someone else uploads a file with the same name, it's better to write a simple function to generate a random name:
const path = require('path');

const generateUniqueFileName = (fileName) => {
  const extension = path.extname(fileName)
  const date = Date.now();

  let randomHash = ''
  const characters = 'ABCDEFGHIJKLMNOPQRSTUVWXYZabcdefghijklmnopqrstuvwxyz0123456789';

  new Array(20).fill(null).map(_ => {
    randomHash += characters.charAt(Math.floor(Math.random() * characters.length));
  })

  return `${randomHash}-${date}${extension}`
}It's not even a wise choice to depend on only a random generated string: it's better to add something unique to that time, like time ⏱ itself using Date.now();
const upload = new AWS.S3.ManagedUpload({
  params: {
    // pass directly the buffer string
    Body: files.photo.data,
    // pass the file name
-   Key: files.photo.name,
+   Key: generateUniqueFileName(files.photo.name),
    // make it public
    ACL: 'public-read'
  },
  // use the const s3 that we defined above
  service: s3,
})Saving the messages to the MongoDB (Optional)
Now, because we have the file and form message, we can save them into the database.
I'm going to use MongoDB for this purpose. I assume that you have a working MongoDB setup; if you don't you can checkout this page
I'm going to use mongoose npm package in order to do the operations inside our express.js app
Install Mongoose
$ npm install mongoose --saveCreate A MongoDB Database
$ mongo
$ use contactformImport Mongoose
Add this code to index.js
const mongoose = require('mongoose')

mongoose.connect('mongodb://localhost:27017/contactform');Create Model
First let's create a directory called models under our project root, than create form.js into it
mkdir models
touch models/form.jsOpen the empty form.js using your code editor, and paste this:
const mongoose = require('mongoose');

const form = new mongoose.Schema({
  fullName: String,
  email: String,
  message: String,
  photo: String,
});

module.exports = mongoose.model('form', form);Models are basically MongoDB Schema on steroids - you can take a look at them here to learn more. All of the fields I defined are the fields we have in our form.html
Import our Model
Let's import our model into the index.js
const mongoose = require('mongoose')

mongoose.connect('mongodb://localhost:27017/contactform');

+ const Form = require('./models/form')Saving the form message
Let's change our main route for saving the submission:
app.post('/submit', async (req, res) => {
  const { files } = req

  try {
    const upload = new AWS.S3.ManagedUpload({
      params: {
        // pass directly the buffer string
        Body: files.photo.data,
        // pass the file name
        Key: generateUniqueFileName(files.photo.name),
        // make it public
        ACL: 'public-read'
      },
      // use the const s3 that we defined above
      service: s3,
    })

    const response = await upload.promise()

+    const { fullName, email, message } = req.body
+    const submission = new Form({
+      fullName: fullName,
+      email: email,
+      message: message,
+      photo: response.Location
+    })

+    submission.save()

-    res.send(response)
+    res.send(submission)
  } catch (error) {
    res.send(error)
  }
})Little trick
While the key and the value are same we can convert our code to this:
const submission = new Form({
  fullName,
  email,
  message,
  photo: response.Location
})
Let's try it
Visit https://localhost:3031 and fill the fields
Click Submit, then:
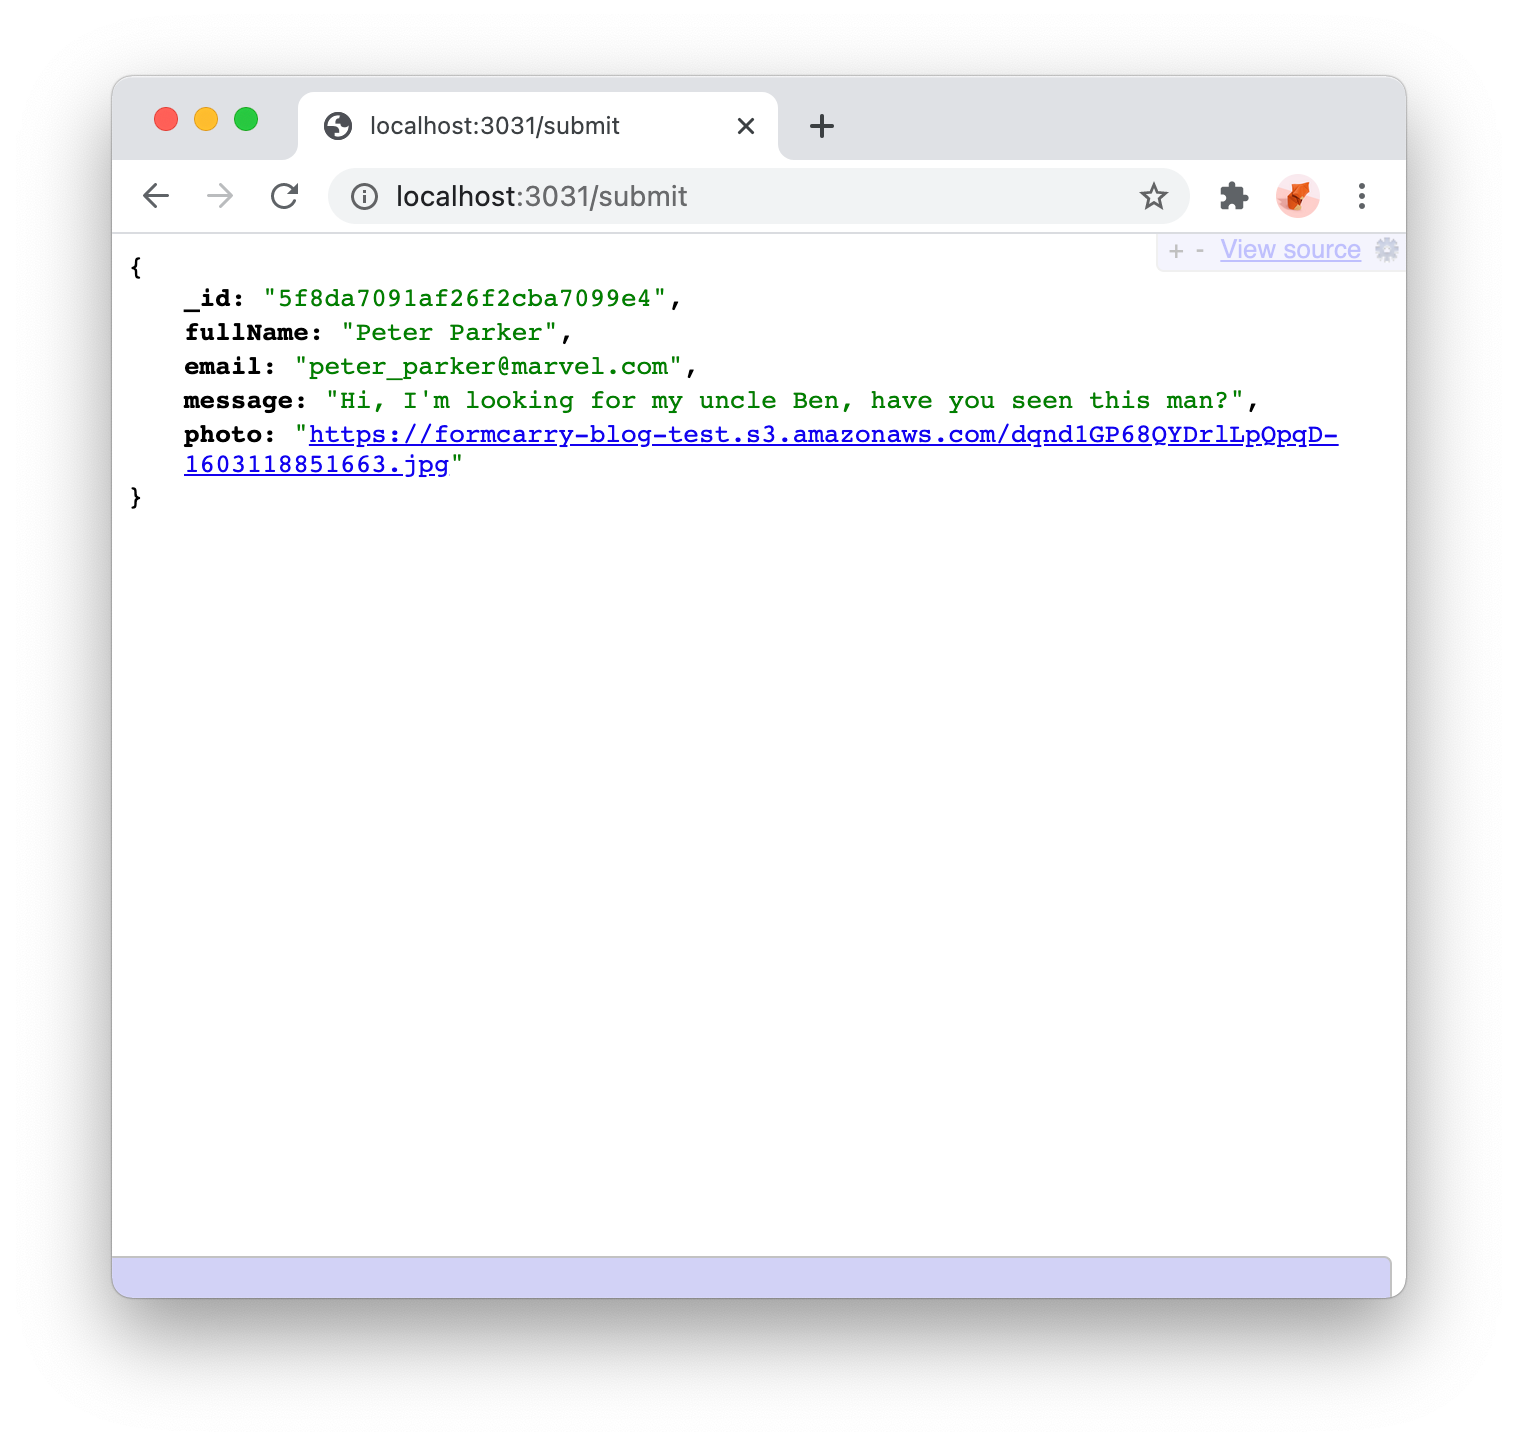
That's it! now you have a perfectly functional form.
Alternative and Simple Way: Use Formcarry
By no means all of those process are time consuming stuff, we have an offer for you, feel free to try formcarry - form backend, instead of coding everything on your own you can have a file upload ready form in under a minute just by changing your form's action attribute
<form action="https://formcarry.com/s/{YOUR_FORM_ID}" method="POST" enctype="multipart/form-data">
    <label for="email">Email Address</label>
    <input type="email" id="email" name="email">

    <label for="fullName">Full Name</label>
    <input type="text" id="fullName" name="fullName">

    <label for="message">Message</label>
    <textarea name="message" id="message"></textarea>

    <label for="photo">Photo</label>
    <input type="file" id="photo" name="photo">

    <button type="submit">Submit</button>
  </form>
Comparing the steps above, formcarry is a very fast and secure way to collecting submissions with file attachments, use it in your contact forms, job application forms, or event forms as you need.
Grab your Form ID from here for free!